How to Build and Wick a Boro Bridge - Step-by-Step Guide for Beginners
Why Build Your Own Boro Bridge?
Building your own boro bridge is one of the most rewarding skills in boro vaping. Unlike pre-built coils for pod systems, a hand-built bridge gives you complete control over your vape experience - from the warmth of the vapor to the density of the flavor. A properly built bridge outperforms any stock coil, saves money in the long run, and lets you customize your draw to match your preferred style, whether thats tight MTL or restricted direct lung.
This guide covers everything you need: what tools to buy, how to prepare your coil, how to install it in your bridge, and most importantly - how to wick it right so you never get dry hits or leaking.
Tools and Materials You'll Need
Before you start, gather these essentials. Most items are available in the tools and accessories section and wire and cotton category at 2FDeal.
| Tool | Purpose | Recommendation |
|---|---|---|
| Coil jig / coiling rod | Wrap wire into consistent coils | 2.5mm or 3.0mm diameter recommended for bridges |
| Wire cutters | Cut wire legs cleanly | Flush cutters for precise trimming |
| Ceramic tweezers | Pinch coil while pulsing (non-conductive) | Essential - dont use metal tweezers while firing |
| Cotton / wick | Wicking material | Japanese organic cotton or cotton bacon |
| Coil wire | Build the coil | Ni80 24-28ga or 30ga*2+38ga fused clapton |
| Ohm reader / mod | Check resistance and dry-fire | Any regulated mod with ohm display |
Step 1: Choose Your Bridge
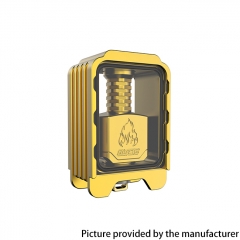
Different bridges have different deck designs. The build process varies slightly, but the principles are the same. The ThunderHead Creations Blaze Bridge is an excellent starting point - its two-post build deck is spacious and easy to work with.
Step 2: Build the Coil
- Choose your wire: For bridges, the sweet spot is 2.5mm inner diameter. Use Ni80 round wire (26-28ga) for MTL, or a fused clapton (30ga*2+38ga) for RDL. Thinner wire heats faster but holds less mass - good for quick MTL hits.
- Wrap the coil: Using your coiling jig at 2.5mm, wrap 5-6 tightly spaced wraps for MTL, or 4-5 spaced wraps for RDL. Keep the wraps close together and even.
- Trim the legs: This is critical. Most bridges need 4-5mm leg length per side. Place the coil in the deck and mark where the screws will clamp. Trim with flush cutters - leaving legs too long causes hot spots and resistance drift.
- Install the coil: Insert the legs through the post holes. Tighten the screws firmly but dont overtighten - you can strip the threads on smaller bridge decks.
Step 3: Dry-Fire and Adjust
Mount the deck on your mod or ohm reader. Start at 12-15W (for round wire) or 18-22W (for clapton) and pulse briefly. Watch for even glow from the center outward. If one side glows brighter, stop and strum the coil with your ceramic tweezers to work out hot spots. Continue pulsing until the coil glows evenly from center to edges.
Target resistances for bridges:
- MTL (tight draw): 1.0-1.6 ohm - use 28ga round wire, 6 wraps at 2.5mm
- RDL (restricted): 0.6-0.9 ohm - use 26ga round wire, 5 wraps at 2.5mm
- DL (open): 0.3-0.5 ohm - use fused clapton, 4 wraps at 2.5mm
Step 4: Wick the Bridge
Wicking a bridge is different from wicking an RTA. Boro bridges have smaller chambers and tighter juice flow channels. Here are the specific techniques that work:
- Cut the right amount: Take a strip of cotton about 5-6mm wide (about half the width of standard cotton pad). Peel off the outer layers from both sides.
- Roll gently: Twist one end to thread through the coil. The cotton should slide through with light resistance - not so tight that it moves the coil, not so loose that you see gaps between cotton and coil wall.
- Trim the tails: Cut the tails so they just reach the bottom of the juice ports. For most bridges, this means leaving 4-5mm of tail past the coil on each side. Too long = muted flavor and restricted flow. Too short = leaking.
- Thin the tails: This is the secret to good bridge wicking. Take your tweezers and comb out about 30% of the fibers from each tail end. Fluff them gently. This prevents vapor lock and ensures liquid flows freely.
- Tuck and position: Using your tweezers, gently guide the tails into the juice ports. They should sit loosely in the channels, not packed tight. Leave a tiny gap between the cotton and the port wall for air to escape as liquid enters.
|
Pro tip: After wicking, fire the coil briefly (without the chamber/tank on) to check the cotton isnt burning. If you see smoke or smell burning, the cotton is too tight in the coil - remove and re-wick with thinner cotton. |
Step 5: Assemble and Test
- Slide the chamber on carefully, making sure the cotton tails stay in place
- Fill the tank with e-liquid and wait 5 minutes - let the cotton fully saturate
- Start at low wattage (10-12W for MTL builds, 18-22W for RDL) and take short primer puffs without firing to help capillary action
- Then fire at your target wattage - you should get clean flavor immediately
Common Problems and Fixes
| Problem | Cause | Fix |
|---|---|---|
| Dry hit after 2-3 puffs | Cotton too tight in coil or ports | Rewick with thinner cotton, comb out tails more aggressively |
| Leaking from airflow | Too little cotton in ports | Use slightly more cotton or leave tails longer |
| Gurgling / spitback | Over-saturated coil or wattage too low | Increase wattage by 2-3W or check cotton density |
| Muted flavor | Coil position too high or wick too thick | Lower coil closer to airflow, thin cotton tails more |
| Hot legs / uneven glow | Leg length mismatch or screws not tight | Trim legs equal length, retighten screws, strum coil |
Recommended Bridges and Tanks
Here are bridges that work well for different vape styles, all available at 2FDeal.
| Bridge | Best For | Build Difficulty | Airflow |
|---|---|---|---|
| THC Blaze Bridge | Beginners, all-round | Easy | MTL to RDL |
| SXK 415BB V2 MTL Bridge | MTL purists | Medium | Tight MTL only |
| YFTK Monarchy Mobb TC | Flavor chasers | Medium | MTL to RDL |
Wicking at a Glance
Here is a quick reference table for wicking different bridge types:
| Bridge Type | Cotton Width | Tail Length | Port Fill |
|---|---|---|---|
| Two-post (Blaze, etc.) | 5-6mm | 4-5mm | Loose - 60% fill |
| Clamp-style (415BB, etc.) | 4-5mm | 3-4mm | Light - 50% fill |
| Bridge with honeycomb airflow | 5mm | 5mm | Medium - 70% fill |
Frequently Asked Questions
Q: Why does my bridge taste burnt after one day?
This is almost always a wicking issue, not a coil issue. The cotton is too dense in the juice ports. Remove the cotton, comb out more fibers, and re-wick with less density. Also check that your wattage is appropriate for the coil mass you built.
Q: What wire is best for bridge building?
For MTL bridges, 28ga Ni80 round wire at 2.5mm ID with 6 wraps is the gold standard (approximately 1.2 ohms). For RDL bridges, 26ga Ni80 or a 30*2/38ga fused clapton at 2.5mm ID produces excellent flavor (0.5-0.7 ohms).
Q: Can I use mesh in a bridge?
Most boro bridges are designed for round wire or clapton coils. Dedicated mesh bridges are rare. If you want mesh, look for bridges specifically designed for it.
Q: How often should I change the cotton?
Every 3-5 days for clear liquids, every 1-2 days for sweet or dark liquids. You can dry-burn the coil to clean it, but always re-wick with fresh cotton. A quick indicator: if the flavor drops off or the vapor looks thin, its time to re-wick.
Q: My bridge leaks when I lay the mod on its side. What is wrong?
This is normal for many bridges when laid flat for extended periods, but excessive leaking means the cotton tails are too thin. Remove the tank and check if you can see light through the ports with cotton in place. If you can, re-wick with slightly thicker cotton or leave tails 1mm longer.
Published by 2FDeal Vape Blog. Always check your local vaping regulations. Build safely and respect ohms law.